Everything you need to transform frontline operations
Lower downtime, rework and overtime costs: see how top organizations improve operations and empower their frontlines.

AI Procedure Generation
Generate high-quality SOPs from video, automatically
Full Document Management
Control access to content across people, sites and versions
Spatial Content Organization
Point your phone at a machine to find the latest and greatest SOP
Author
Unlock the value of all your operational knowledge via intuitive AI content creation and management tools
AI Procedure Generation
Generate high-quality SOPs from video, automatically
Full Document Management
Control access to content across people, sites and versions
Spatial Content Organization
Point your phone at a machine to find the latest and greatest SOP
Multimedia
Procedures
Procedures
Guide operators in-context with easy-to-follow instructions
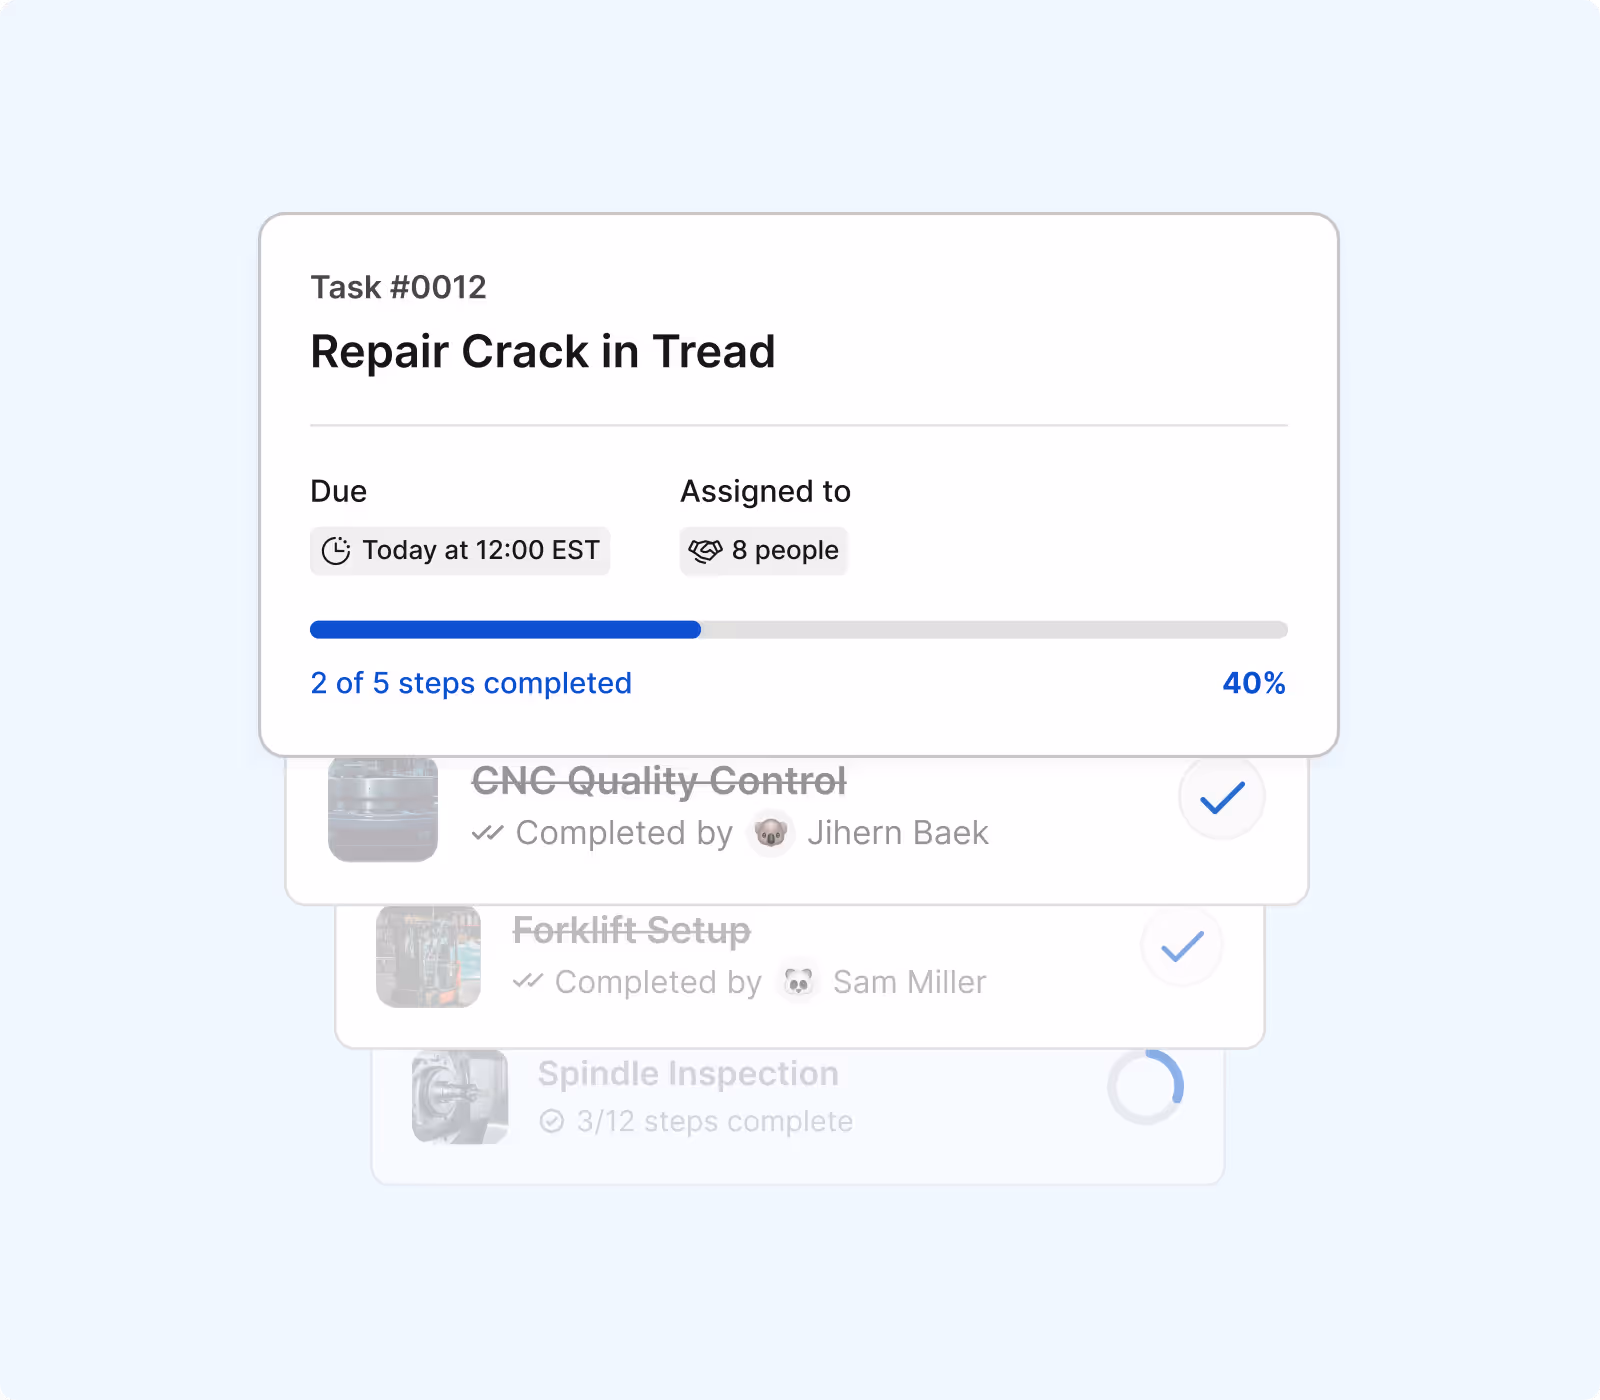
Tasks &
Checklists
Checklists
Assign, track, and ensure work is done correctly
Quizzes
Test operator knowledge and ensure operational readiness with quizzes
Workflows
Ensure the right work is done at the right time with easy-to-follow digital work instructions
Multimedia
Procedures
Procedures
Guide operators in-context with easy-to-follow instructions
Tasks &
Checklists
Checklists
Assign, track, and ensure work is done correctly
Quizzes
Test operator knowledge and ensure operational readiness with quizzes
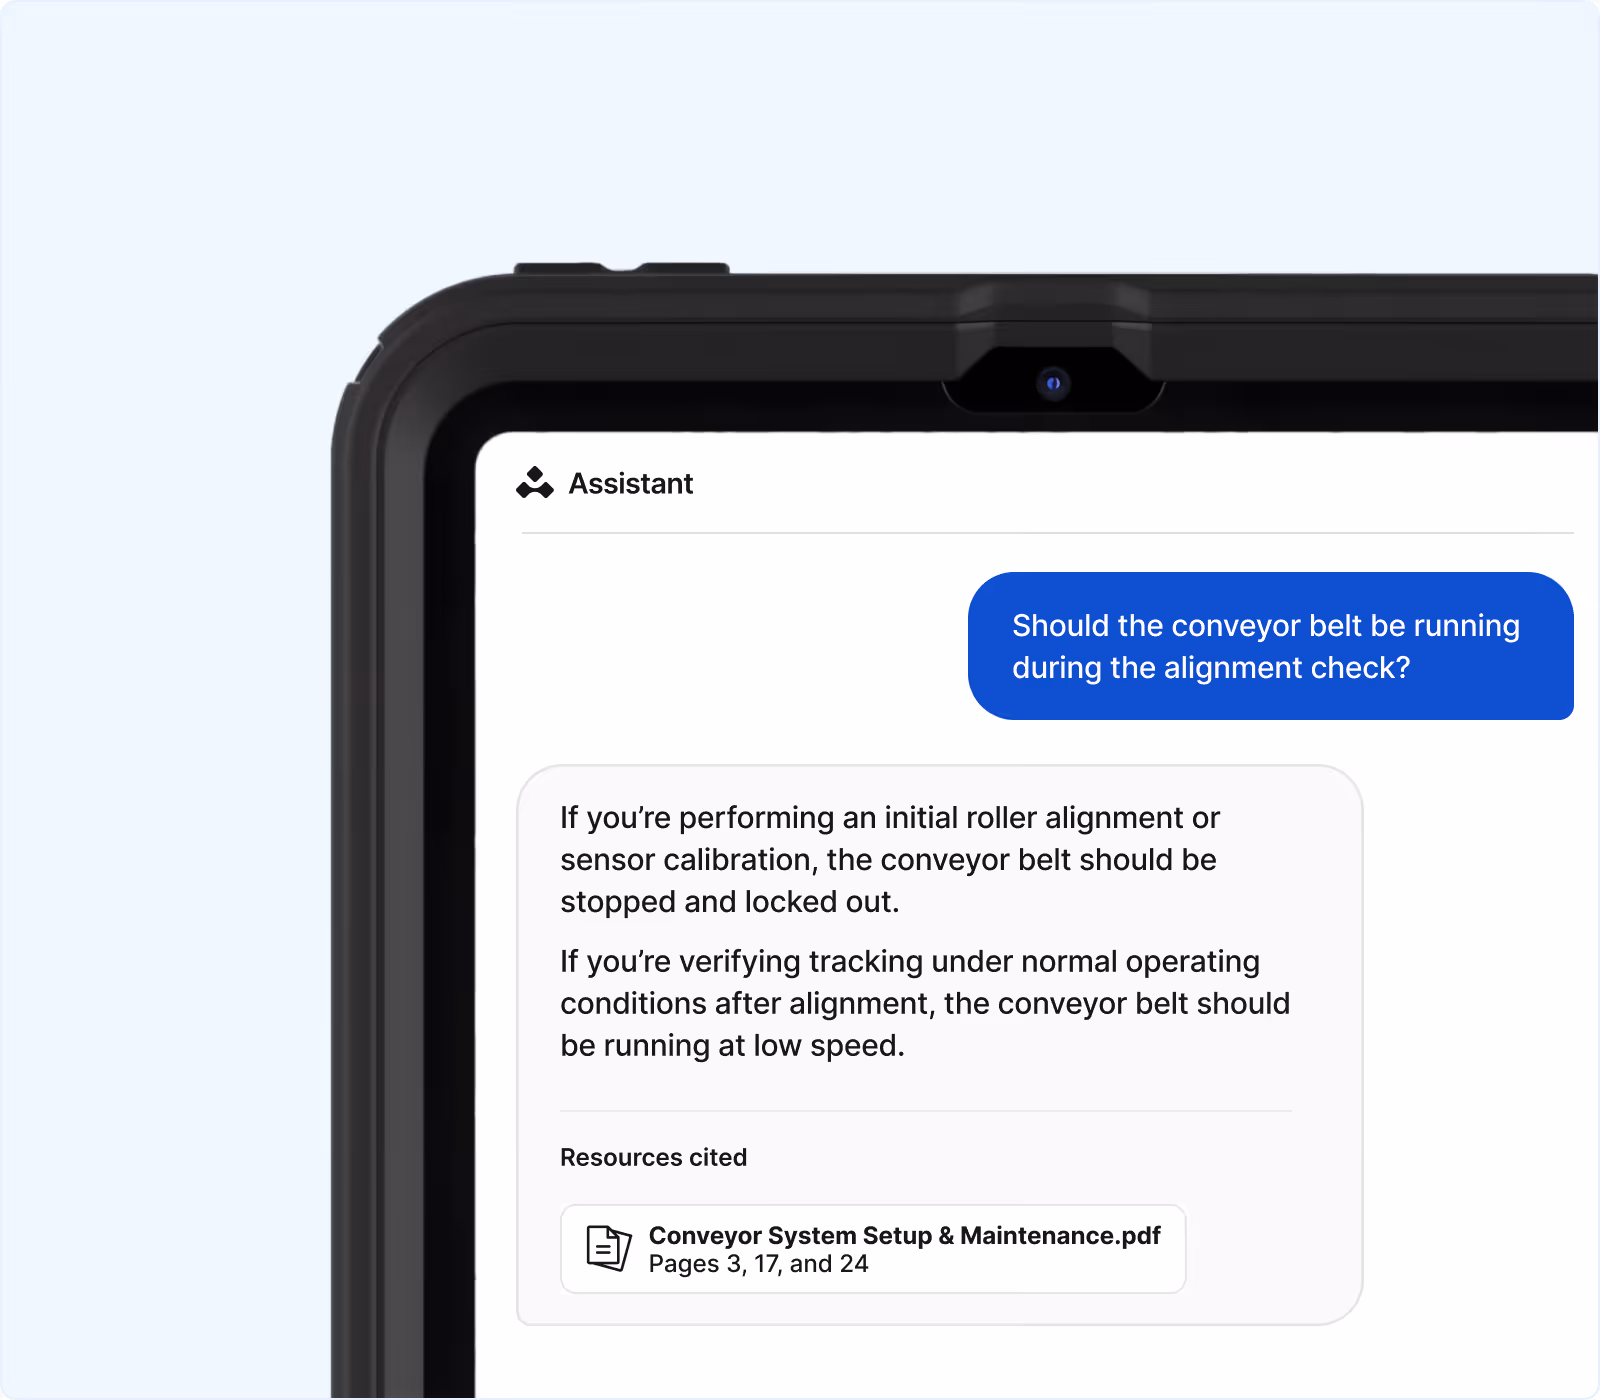
Squint Copilot
Find answers instantly with AI that references all your internal knowledge
Spatial Content
Overlay critical information directly
onto machines and equipment
Spatial Content
Overlay critical information directly
onto machines and equipment
Assistant
Give operators on the floor and technicians in the field access to your company’s most knowledgable expert in the palm of their hands
Squint’s Assistant
Find answers instantly with AI that references all your internal knowledge
Spatial Content
Overlay critical information directly
onto machines and equipment
Spatial Content
Overlay critical information directly
onto machines and equipment
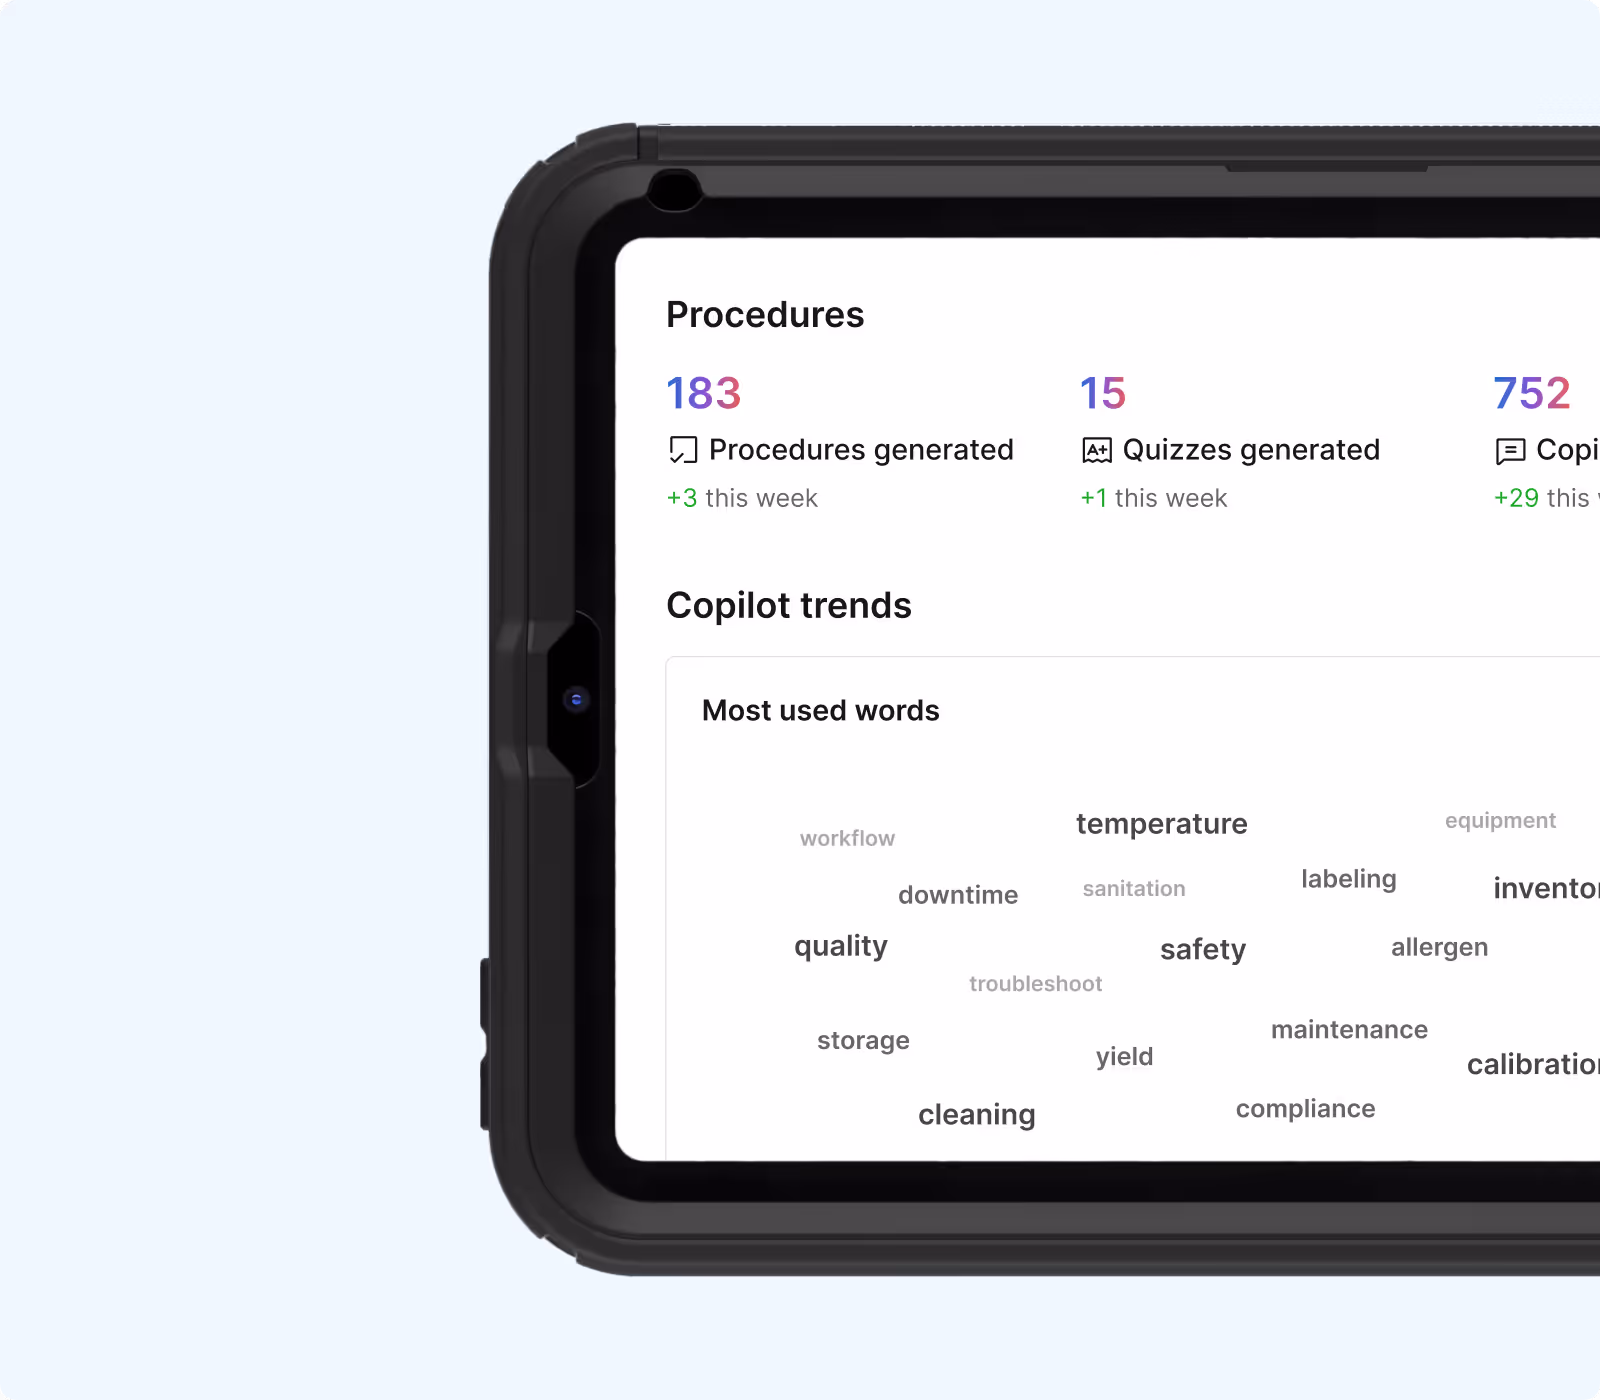
Dashboard
Get insight into what’s happening across all your operators and sites
Procedure Perform
Automatically capture floor data to reveal patterns, bottlenecks, and insights.
Time Studies
Analyze and improve performance on individual lines
Analytics
Ensure the right work is done at the right time with easy-to-follow digital work instructions
Dashboard
Get insight into what’s happening across all your operators and sites
Procedure Perform
Automatically capture floor data to reveal patterns, bottlenecks, and insights.
Time Studies
Analyze and improve performance on individual lines
Integrations
Connect to all your existing systems to ensure complete interoperability

Squint API
Build custom connectors to any third party system using Squint’s RESTful APIs
Squint Link
Quickly and easily build custom integrations to the most popular apps in the manufacturing ecosystem
Fully-featured and Enterprise-ready
A feature set built for enterprise-wide deployments

Video-to-Procedure Al
AI Voiceover
Tasks Assignments
Access Controls
AR Spatial Guidance
Multi-Action Modules
Custom Properties
Real-Time Insights
Automatic Translation
Checklists
Notifications
Scheduled Exports
Single-Sign-On
Caption Editing
Role-Based Access Controls
Document Control
Video-to-Procedure Al
AI Voiceover
Tasks Assignments
Access Controls
AR Spatial Guidance
Multi-Action Modules
Custom Properties
Real-Time Insights
Automatic Translation
Checklists
Notifications
Scheduled Exports
Single-Sign-On
Caption Editing
Role-Based Access Controls
Document Control
Video-to-Procedure Al
AI Voiceover
Tasks Assignments
Access Controls
AR Spatial Guidance
Multi-Action Modules
Custom Properties
Real-Time Insights
Automatic Translation
Checklists
Notifications
Scheduled Exports
Single-Sign-On
Caption Editing
Role-Based Access Controls
Document Control
Video-to-Procedure Al
AI Voiceover
Tasks Assignments
Access Controls
AR Spatial Guidance
Multi-Action Modules
Custom Properties
Real-Time Insights
Automatic Translation
Checklists
Notifications
Scheduled Exports
Single-Sign-On
Caption Editing
Role-Based Access Controls
Document Control